Setting up online voting: How it works
Three easy steps to your online voting!
The Online Voting Manager gives you full control over your voting procedure. Just three steps is all it takes to set up your online voting.
To create your first online election, open the POLYAS Online Election Manager at configure.polyas.com and log in.
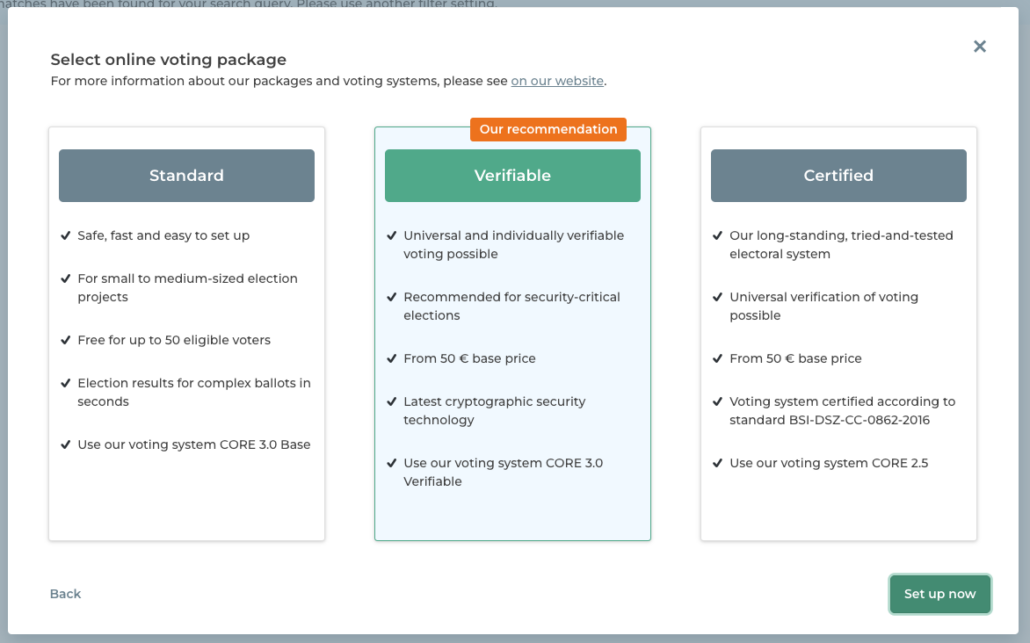
Click on “Create project” in the top left tile and select the online election. Click on “Next”. In the next step select the voting system you want to use.
We offer the following packages:
- Electing candidates and votingStandard – for small to medium sized elections and up to 50 voters free of charge
- Verifiable: for security critical elections and recommended by us
- Certified: for elections where the electoral rules require a certificate

Not sure which package is right for you? Check out the differences on our website >
Finally, click on ‘Set up’. The project configuration for your online election will now open automatically. You can now configure your ballot papers, upload your voters list and add other features to your election. Once you have completed the configuration, you can also start your election here.
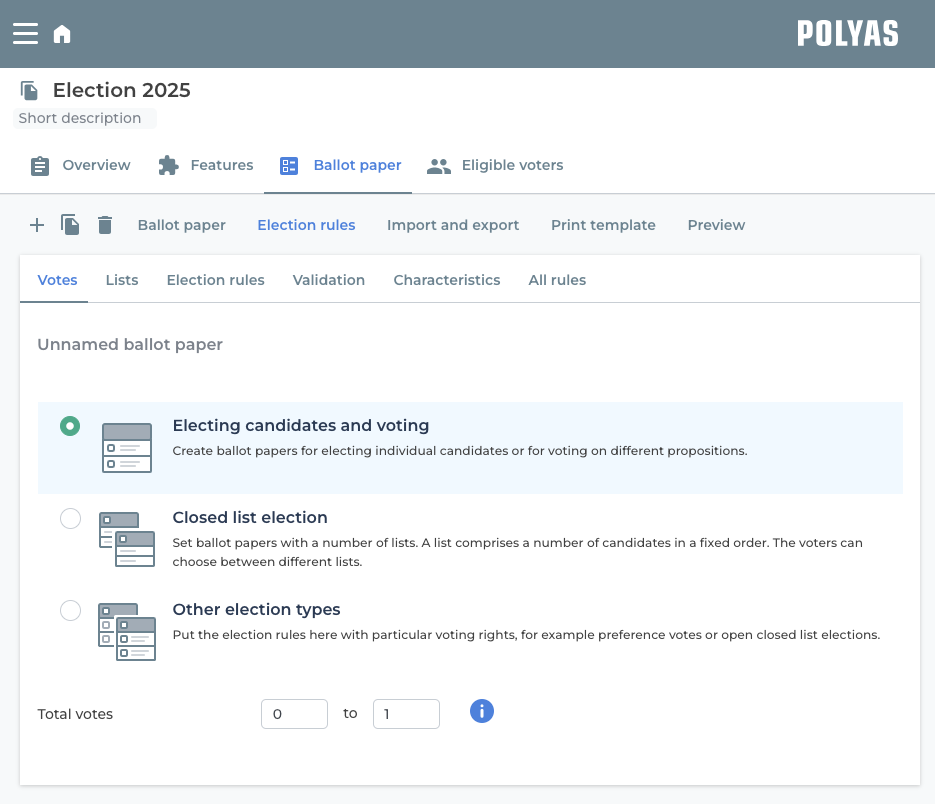
1. Create ballot papers
Use the “Ballot paper” section to create the various ballot papers that you need for your election. The different types of ballot papers determine the rules of the ballot paper:
- Electing candidates and voting
- List election
- Other forms of voting
Depending on the type, you can then define the various votes to be cast and set up other options such as the casting of invalid ballots.
Find out how to setup ballot papers >

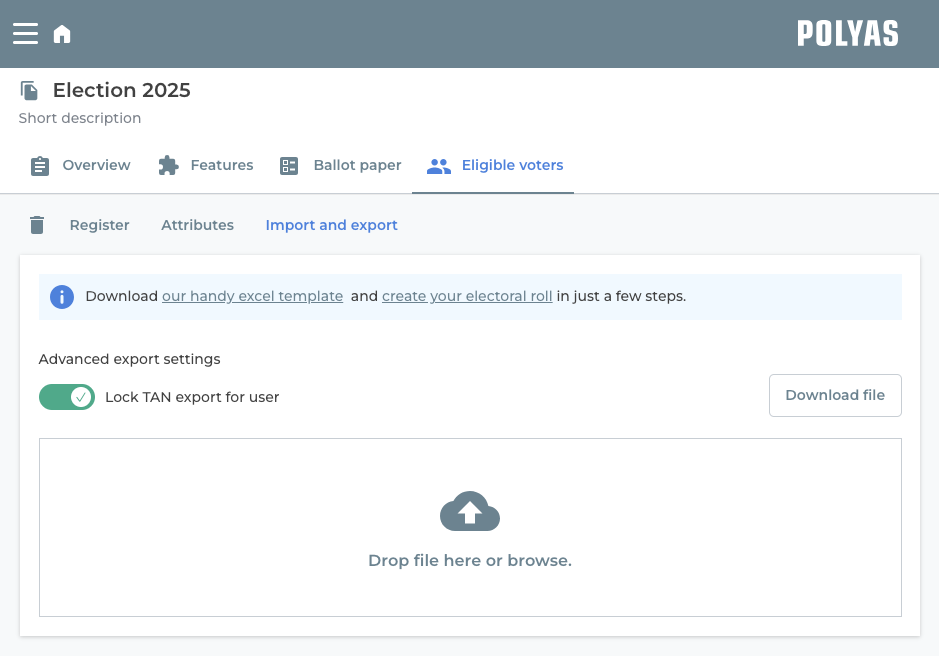
2. Create the electoral roll
You create your electoral roll in the “Eligible voters” section. You can do this manually or upload your electoral roll as an Excel spreadsheet. The POLYAS Online Voting Manager lets you decide how much information about your voters is contained in the electoral roll. The minimum would be an ID or an e-mail address that the voter uses as identification to login to the voting system.
Read more about setting up the electoral roll now >

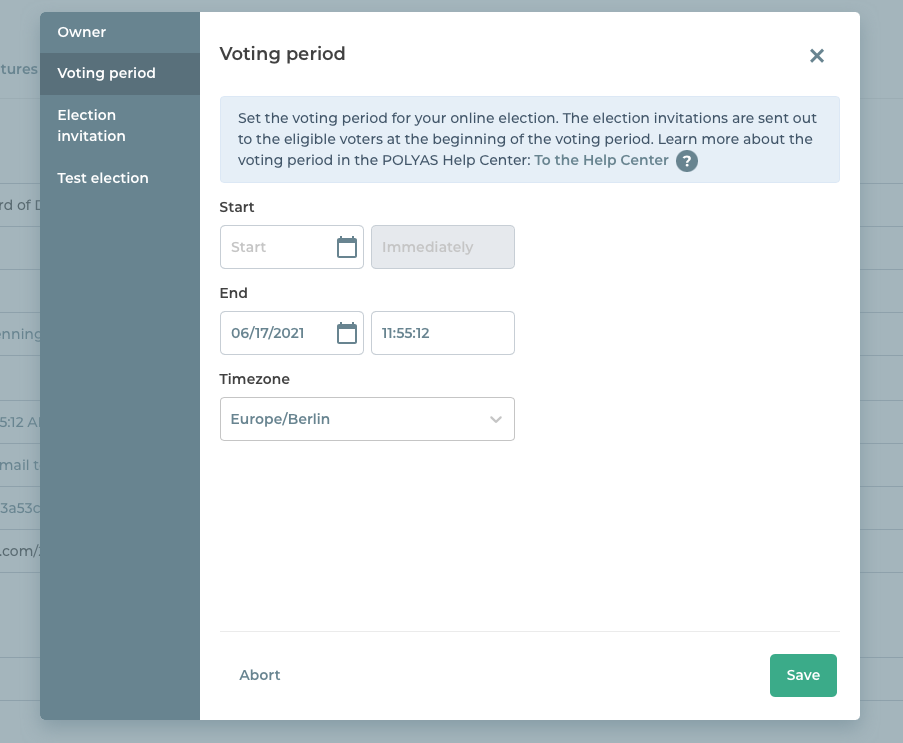
3. Start the voting
Now set your voting period and write a voter invitation that speaks to your voters personally. You are very welcome to use our standard text for your voter invitation. The voter invitations are sent to eligible voters when the election starts.
Learn more about setting up and sending the voter invitation >
Optionally, you can access our Features section and check out the features there, such as reminders by e-mail, voter groups, or including the logo of your organization on the ballot papers.
By clicking on “Complete” you can legally seal and start your election.
► Caution: Once you have sealed and paid for the election, you can no longer make changes to it. If you would like to test the voting procedure in advance, you can conduct a free test election with up to nine test voters. You can also use this to check whether your settings are correct.
In this way, you can use a test election to check in advance whether everything is set up correctly.

