Email voter invitations in POLYAS online voting manager
The easiest way to send voter invitations
- Generate secure access data to the system
- Send election invitations by email
- Customize notification texts
Use the option of sending voter invitations to your online election by email. Not only does it simplify the preparation process for your election, but it also saves your budget and our environment as compared to the traditional letter post. Your eligible voters receive the necessary access data on time, before the actual start of the election.
1. Set election period
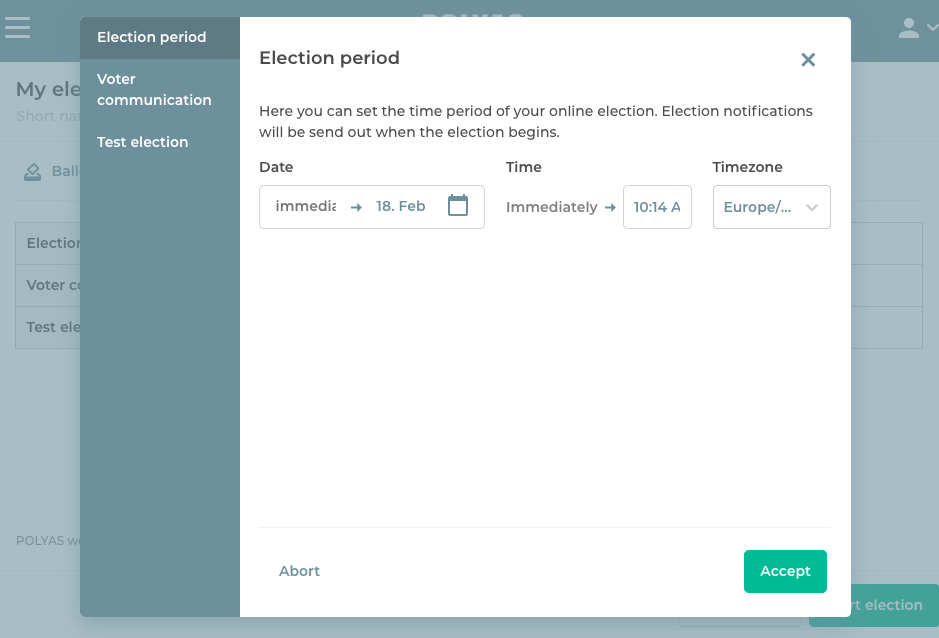
First, create a ballot and electoral roll with email addresses of your eligible voters. Set the election period. To do so, click on the “Settings” tab and then on “Election period”.
Set the date and time for your election period and choose the time zone.
Start of the election: Default settings display the”Immediately” option, but you can, of course, start your election at any time suitable for you.
End of the election: The online polling station closes at this time. Shortly thereafter the election results are displayed and available for download.

2. Customized texts in the voter invitations
Reach voter invitations by clicking on the respective link in menu.
Enter the text for your voter invitations. You can edit the default text and adjust it to your voters. Please note that the data in {{double brackets}} should not be changed – those are place holders for your eligible voters. Once you finished editing, click on the “Accept” button. The voter invitation will be sent out at the time you have specified as the election start time.
If the video is not displayed correctly, please reload the page and confirm our cookies.
2.1 Use of placeholders
Other placeholders can be used to give your voter invitations an individual and personal touch. In the modal, first navigate to the second blue info box and click on “More info”.
A larger window will then open listing all available placeholders and explaining to you what the system automatically inserts for each placeholder.
For example: the system will automatically insert the election title you entered for the placeholder “{{title}}”.
Many of our placeholders are related to the configuration of the electoral register and can only be used in the election invitation if the corresponding information is stored in the electoral register.
For example: the placeholders {{salutation}} and {{lastName}} allow you to address your voters individually. The system stores the appropriate salutation for the eligible voter in {{salutation}} and their last name in {{lastName}}. However, this will only work if you’ve entered both the salutation and last name in the register. In turn, the attributes “salutation” and “last name” must have been added and the related information must have been stored for all voters.
You can read more about how to use attributes here >
3. Carry out test election and send emails
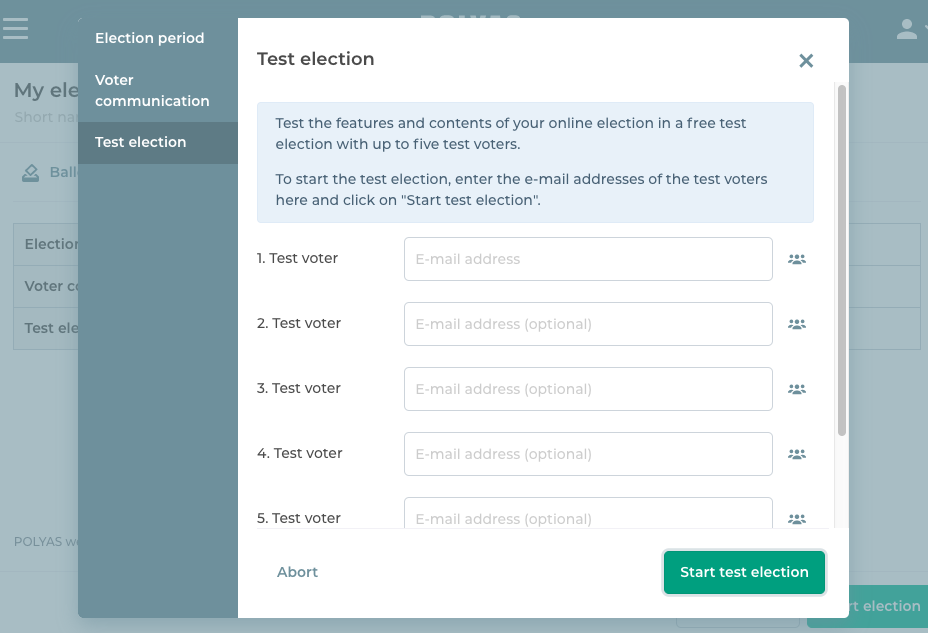
You can thoroughly test how online voting works for your eligible voters and check if all ballots are correct. Simply enter the email addresses of your test voters and start the test election.

Test your election. Your ballot is sent to up to 5 email addresses. You can test how online voting works for your eligible voters and whether all the ballots are correct.
Here you will find a detailed instruction on how to conduct a test election >
If you found any mistakes in your test election, you can correct these afterwards and test your election once again. Once you’ve paid, preparation for the voting project is complete. The voting starts at a time specified by you.
► NOTE: As soon as you have paid for your election and sealed it, you can no longer make changes. Therefore please make sure that everything is correct beforehand.
