
Ballots for your Live Voting
Create ballot papers and information
- Create ballots in advance or on the day of the meeting
- Manage voter groups and voters
- Simple management and custom configuration
1. Create ballots
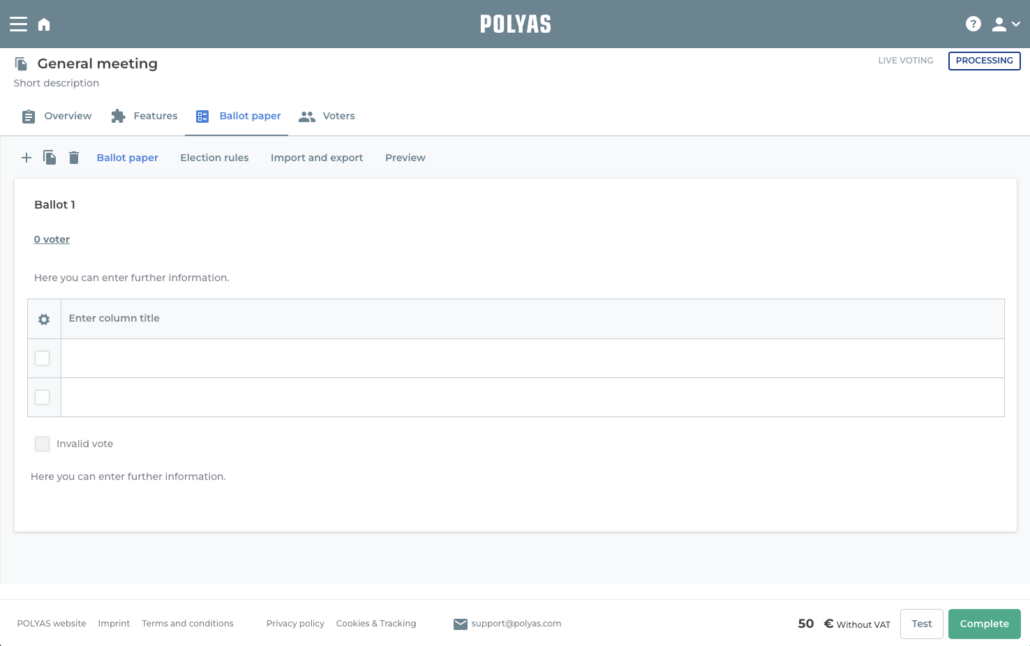
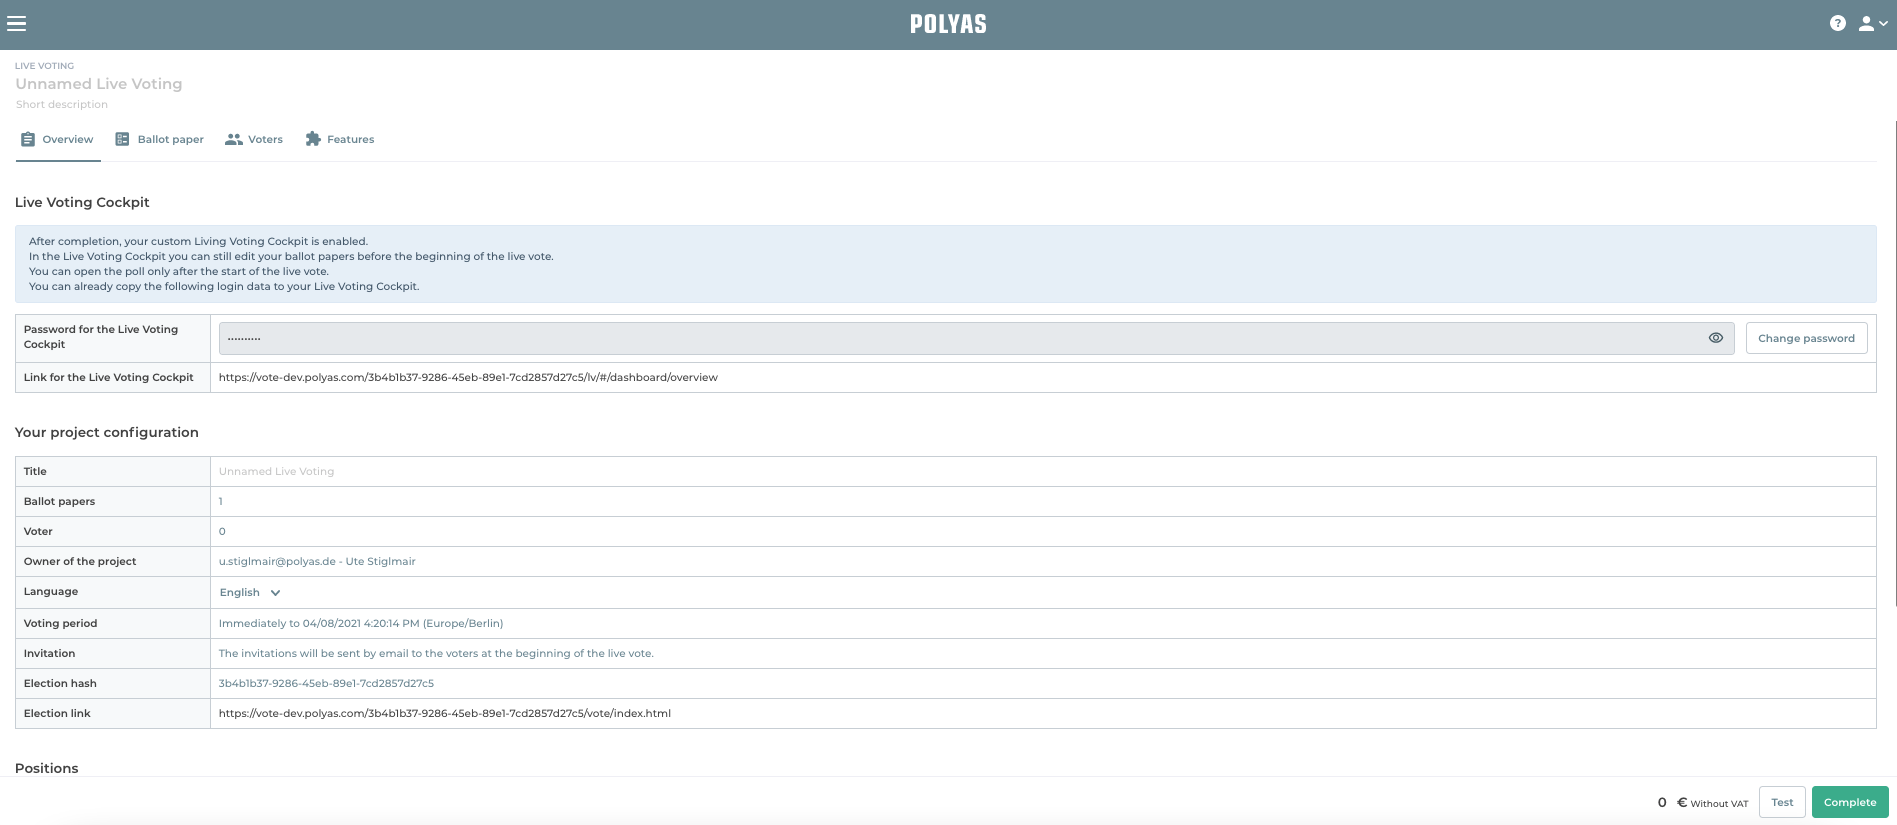
Access the POLYAS Online Voting Manager at configure.polyas.com, create a new project and select “Live Voting”. Give your Live Voting a title (e.g. 2025 General Meeting). Now select the tab “Ballot papers”. You will now find your first unnamed ballot paper here. You can give it a name now.
2. Settings for voting
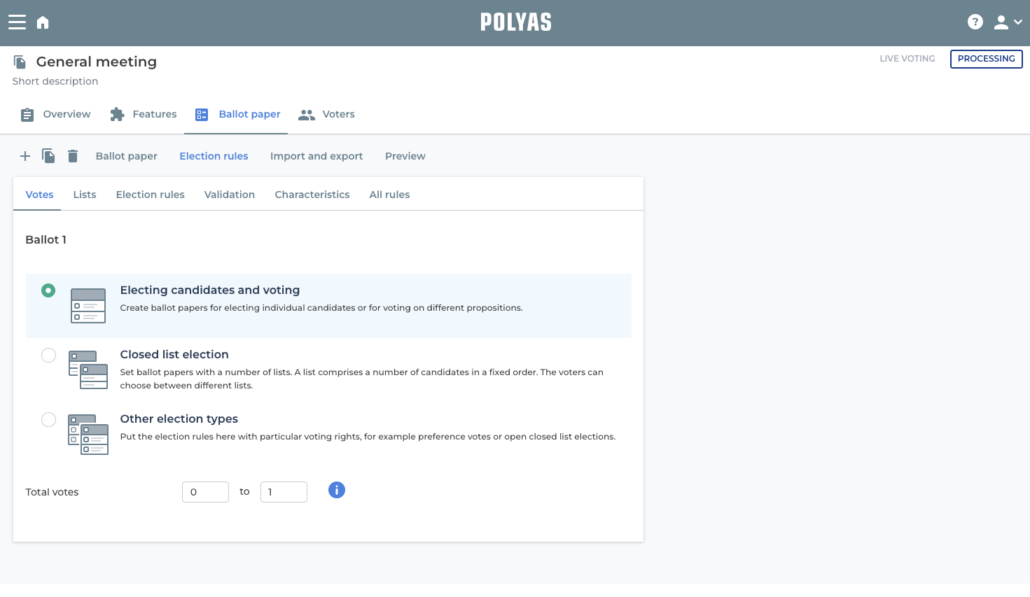
Select the “Election rules” tab and decide on a type of ballot paper:
- Electing candidates and voting,
- List election
- or other election types.
Then define the number of total votes (range between minimum and maximum valid votes).
Use the “Election Rules” and “Validations” tabs to configure things like invalid voting and casting too many or too few votes. It is also possible to set up an abstention option here.
For list-based and other types of voting, there is also the option that votes may only be distributed among one list (under “Voting rules”).
3. Set the ballot paper format and fill in the ballot paper
Now go to the “Lists” tab. Here you can add new lists and manage existing ones. You have the following options:
– Set the number of rows and columns
– Show or hide the list name and column title.
Below that, you can also make further settings for the allocation of votes. Depending on the ballot paper type, you can define the range of valid votes per line, per list and/or within the list. To assign the list title for list elections or other forms of voting, click on the cogwheel symbol to the right of the list.
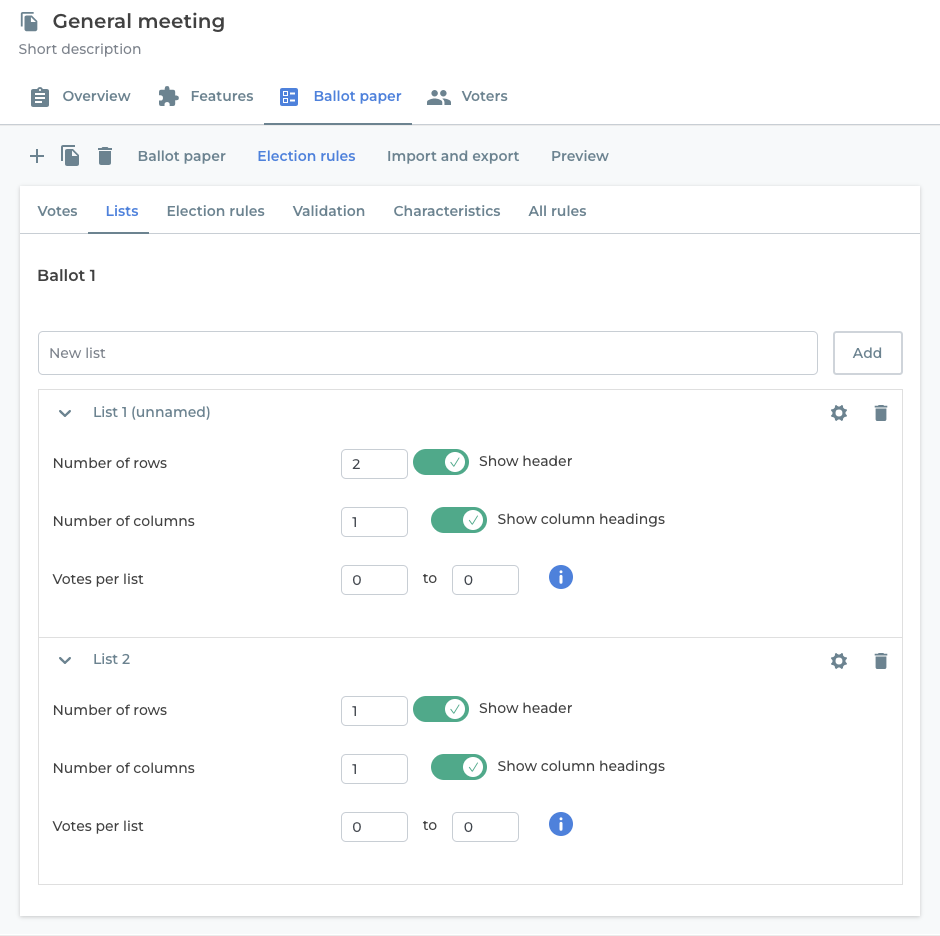
Attention: If you implement a list vote or another voting form on your ballot and there are several lists on your ballot, these settings initially only apply to the list in which you opened the settings. You can use the cogwheel on the right to make settings for all lists collectively.
Tip: Alternatively, you can also make the settings described above directly in the ballot. To do this, go to the “Ballot” tab and click on the gear icon in the upper left corner of your ballot. Then select “Settings”.
Then click on Save. Now you can fill your ballot with content. To do this, click on “Ballot” and then simply on the respective cell that you want to label. To insert a new row, column or list, click on the cogwheel again.
Note: Another way to add columns and rows or to access the drop-down menu is to use the so-called carrot menus. As soon as you move your mouse over a row, a small down arrow appears on the right side of the row. Clicking on this opens a drop-down menu that allows you to access the list settings and also to add or delete lists, columns and rows. If you hide the headers and column titles, you can still access the detailed settings via the carrot menu.
C
4. Importing and exporting ballots
Under Import and Export, you have the option to:
- Upload several ballots at the same time as an Excel file. Please use our template for this.
- Download all the ballots you have created.
5. Create additional ballots manually
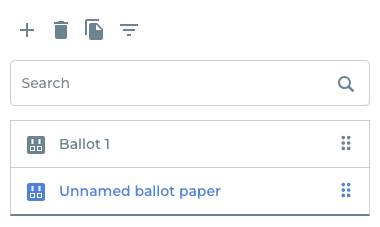
To add more ballots to your election, simply click the “+” icon on the left.
Another unnamed ballot paper will open, along with an overview on the left. Here you can see all the ballot papers you have created and can change the order by holding down the mouse at the six points and moving the ballot paper to the desired position. If you want to delete a ballot paper, select it and click on the trash can icon in the overview.
Use the search field to search for the titles of your ballots.
Click on the slider icon to filter your ballots according to different criteria and thus find the ballot you are looking for.
6. Ballots in the Live Voting Cockpit
You can create or edit new ballots after payment in contrast to online voting. In addition, you have the option to set out information for your voters, for example the agenda or break times. For this purpose, first log into the Live Voting Cockpit where you manage your electronic voting. You will find the link to the app as well as the password in the “Overview” tab of the Online Voting Manager after the payment process.
Click on the “Ballot papers” tab in the Live Voting Cockpit. You can create new information and ballots using the “+” symbol. By clicking on “. . .” you reach the settings. Functions “Settings”, “Format”, and “Sort lists” are available here as in the Online Voting Manager.
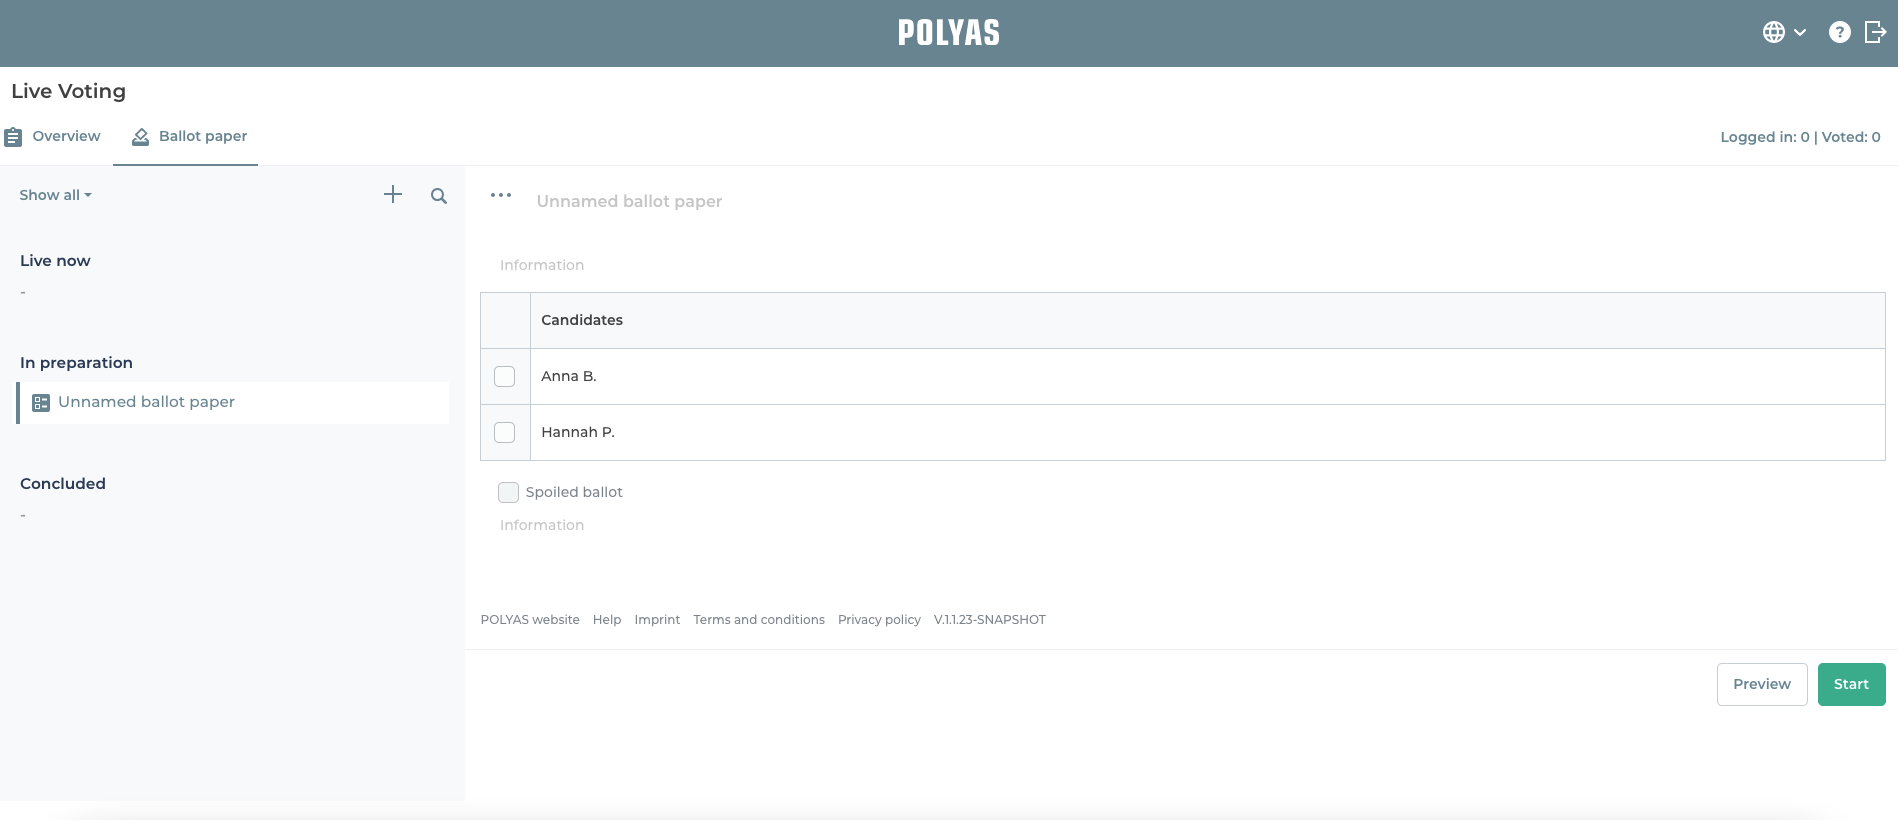
On the left sidebar, you find all of the already created ballot papers and information. You can edit them until you make them available to your members. Use the filter function and the search bar to find individual ballot paper or information.
Find out how Live Voting works and how to create information in the cockpit here.